
What is Three Point Lighting in Video Production?
When clients first walk into our San Francisco studio, the lighting setup is one of the first things they notice. It is also one of the most asked about. Three point lighting is the foundation of nearly every professional shoot you have ever seen, from corporate interviews to executive broadcasts to feature films.
At Argus HD, three point lighting has been the backbone of our work for years. Whether we are filming a CEO interview for a Fortune 100 brand, recording a panel at Moscone Center, or running a green screen shoot for a product launch, the same lighting principle anchors the look.
Let us break down what three point lighting is, why it works so well, and how we use it on every kind of video production we run.
Summary
Three point lighting is a classic technique that uses three light sources, the key light, fill light, and back light, to create depth, dimension, and a polished cinematic look. It is the industry standard for interviews, corporate videos, broadcasts, and most professional film work. Setting it up correctly makes the difference between footage that feels flat and footage that feels intentional.
What Is Three Point Lighting
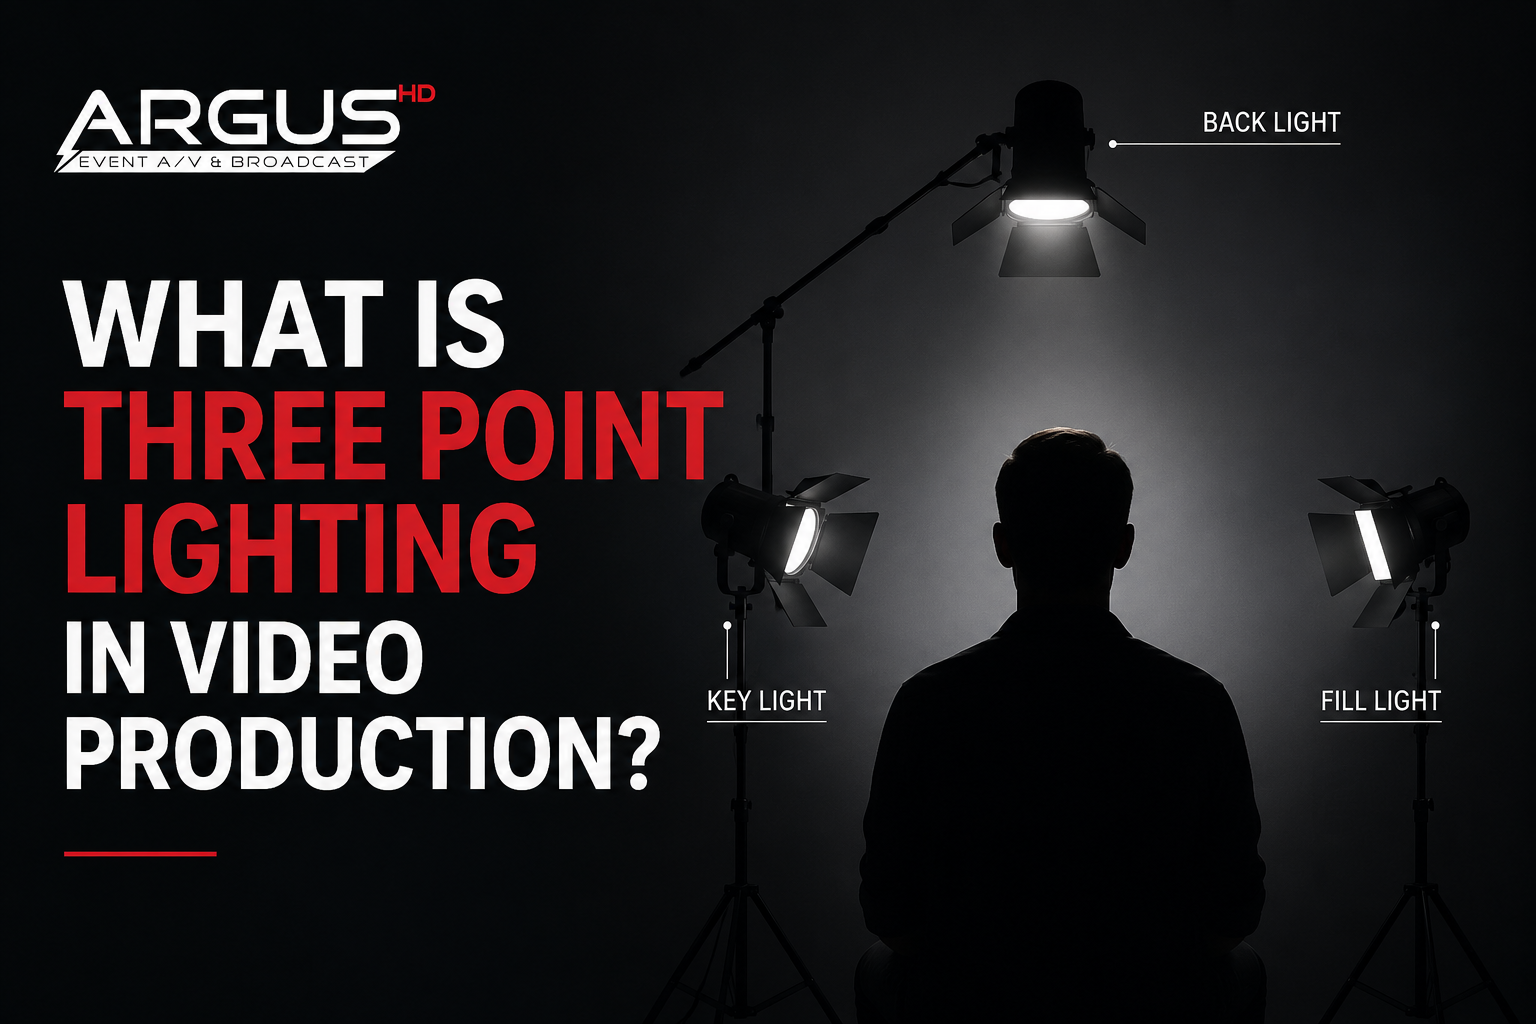
Three point lighting is a method of lighting a subject using three separate light sources placed at strategic angles. Each light has a specific job. Together, they shape the subject, separate them from the background, and create a balanced, professional image.
This setup has been used in film, television, and broadcast for decades. The reason is simple. It is reliable, repeatable, and works in almost any environment.
If you want a deeper look at the elements that make video production work, our blog on which element is key to communicating effectively in video production covers the bigger picture.
The Three Lights Explained
Each light in a three point setup plays its own role. Skipping or misplacing one of them will change the look immediately.
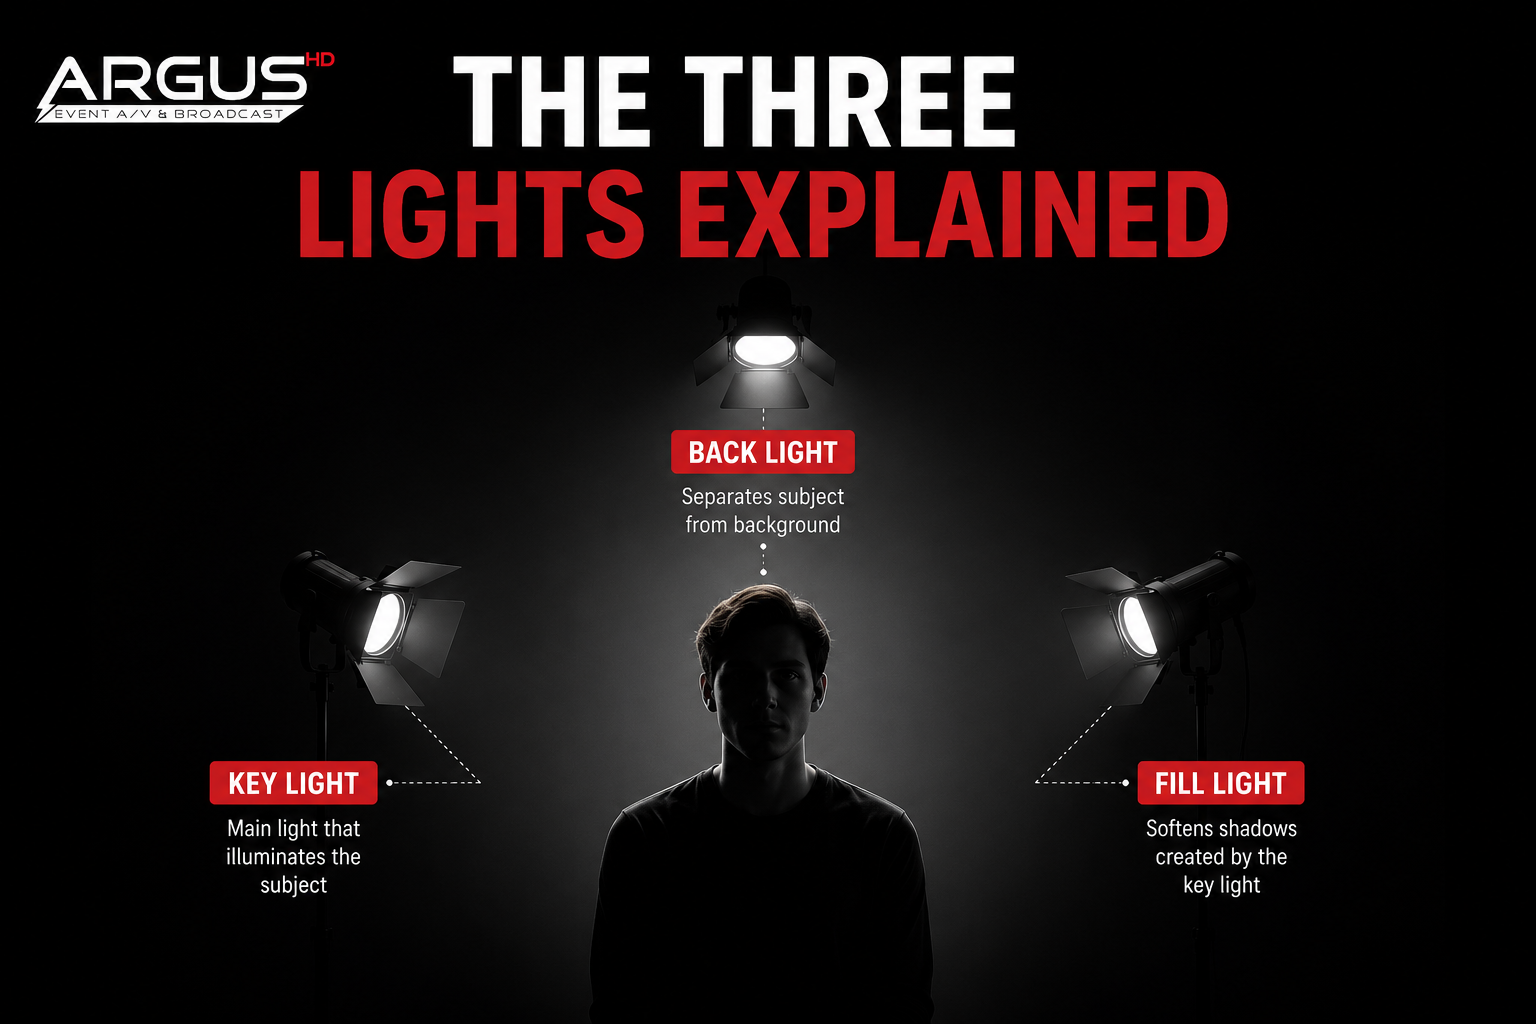
Key Light
The key light is the main light source and the brightest in the setup. It sits at roughly a 45 degree angle to the subject and slightly above eye level. This is the light that defines the shape of the face and creates the dominant highlights and shadows.
Most of the visual character of your shot comes from how this light is positioned and softened. We adjust it based on the subject’s skin tone, glasses, hair, and posture.
Fill Light
The fill light sits on the opposite side of the key light. Its job is to reduce shadows on the darker side of the face without removing them completely. You want some shadow for depth, but not so much that the subject looks harsh.
The fill is usually softer and less intense than the key. We often use a bounce, a diffused panel, or a lower powered LED to keep it natural.
Back Light
The back light sits behind the subject, aimed at their head and shoulders. It creates a subtle outline that separates the subject from the background. This is what gives a shot dimension and prevents the talent from blending into the wall behind them.
Some teams call this the rim light or hair light. The result is the same. It adds depth that the camera alone cannot produce.
How to Set Up Three Point Lighting Step by Step
Setting up three point lighting is not complicated, but it takes care. Here is the order we follow on every shoot.
First, place the key light. Position it 45 degrees off the subject and slightly above. Adjust the intensity until the face is well lit without being washed out.
Second, add the fill light on the opposite side. Lower its intensity until the shadow softens but stays present. The goal is balance, not flatness.
Third, set the back light behind the subject. Aim it at the shoulders and the top of the head. Keep the intensity low enough that it adds separation without drawing attention.
Last, check the camera. Look at the monitor, not just the room. Lighting that looks great to the eye can read very differently through a lens.
For green screen shoots, the setup also needs careful background lighting. Our San Francisco green screen studio has dedicated lights for both the talent and the screen itself.
When Three Point Lighting Works Best
Three point lighting is the standard for any shoot where the subject needs to look professional, intentional, and visually engaging. We use it on almost every kind of project.
It works perfectly for corporate interviews, executive videos, product launches, brand films, and webcasts. Our testimonial and interview video production work relies on it for every shoot, especially when filming founders, customers, and senior leaders.
It also performs well in event coverage. When we film keynotes, panels, and on stage interviews, we adapt the three point principle to fit the venue. You can read more about that in our blog on best practices for event filming.
Common Mistakes to Avoid
We have seen plenty of three point lighting setups go wrong. Here are the issues that come up most often.
Placing the key light too close to the camera flattens the face. Move it off axis to add dimension.
Making the fill light as bright as the key removes the depth completely. The fill should always be softer.
Forgetting the back light is one of the most common mistakes. Without it, the subject and background blur into one plane.
Lighting only for the eye and not for the camera leads to surprises in post. Always trust the monitor.
How Three Point Lighting Looks in Real Productions
At Argus HD, every executive interview we film uses a variation of this setup. A recent Google project required a tight three point arrangement that worked across multiple talent in the same room. The result was sharp, consistent, and ready for a multi platform broadcast.
For our video production work in San Francisco, we adapt the technique based on the venue, talent, and content. A panel at a hotel ballroom needs a different setup than a one on one interview in a corporate office. The principle stays the same. The execution changes every time.
If you are filming outside the Bay Area, the same standards apply across our New York and Los Angeles production work.
Conclusion
Three point lighting may sound simple, but it carries the visual quality of nearly every professional video you watch. The key, fill, and back lights work together to create depth, dimension, and a polished result that holds up on every screen.
At Argus HD, we apply this technique to almost every shoot we run, from quick corporate interviews to multi day executive broadcasts. If you are planning a video project and want it to look intentional, reach out through our contact page. Our senior led team will handle the lighting, the camera, the audio, and everything else so your subject looks exactly the way they should.
Frequently Asked Questions
1. Do I need expensive lights to set up three point lighting?
No. The technique matters more than the gear. A good three point setup can be built with affordable LED panels, softboxes, or even daylight from a window paired with reflectors. Professional shoots use higher end fixtures for control and consistency, but the principle works at any budget.
2. Can three point lighting be used outdoors?
Yes. The sun usually acts as the key light. A reflector serves as the fill, and a separate light or backlit angle provides separation. We adjust the technique to match natural conditions on outdoor shoots.
3. Is three point lighting only for interviews?
No. It works for product shots, panels, narrative scenes, and even live broadcasts. Anywhere a subject needs to look polished and three dimensional, this setup applies.
4. How long does it take to set up three point lighting?
A skilled crew can have a clean three point setup ready in 15 to 30 minutes. Complex shoots with multiple subjects, talent moving across frames, or tricky backgrounds can take an hour or longer to perfect.